How to Fit GHD Thermal Fuse
FIT GHD THERMAL FUSE – REMOVAL AND FITTING INSTRUCTIONS
Read in full before fitting. This is the simplest way that we recommend to fit GHD thermal fuse as it minimises chances breaking plastics.
To Fit GHD Thermal Fuse…….
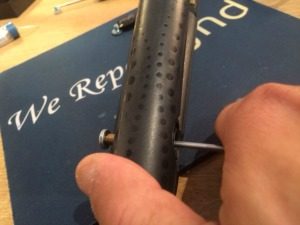
STEP 1. Remove the ghd logo hinge covers carefully with a flat headed screwdriver.

STEP 2. Unscrew the Hinge (hold ghds between your knees for support if required)

STEP 3. Push the hinge pin out and the arms then separate
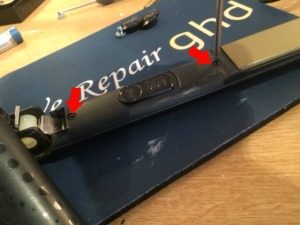
STEP 4. Undo the screws that hold the switch cover panel and remove the cover
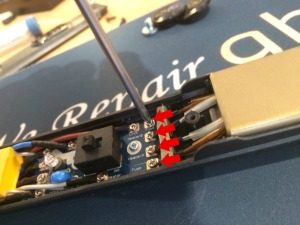
STEP 5. Remove the heater and thermal fuse screws on the circuit board
STEP 6. Remove the heater assembly from the ghd.
(optional step) Cut the connectors off the end of your old thermal fuse (2 BROWN WIRES ONLY)
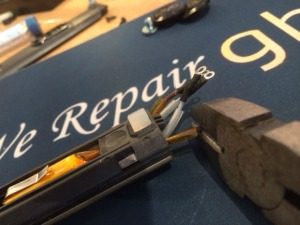
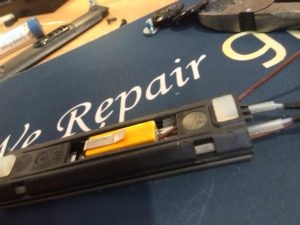
STEP 7. Pull the old fuse out of the heater housing.
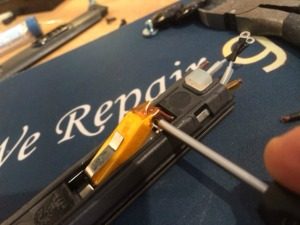
STEP 8. You are then left with something like this….
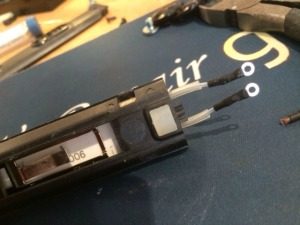
If you have a 3.1b, SS2 and early MK4 models (older models please see the bottom of the instructions (last picture) as you may need to modify the plate holder at this point)
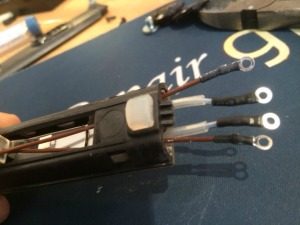
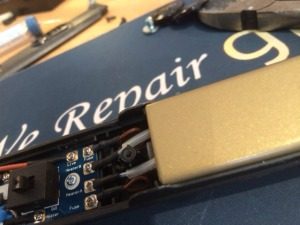
STEP 9. Thread the new thermal fuse wires through the plate holder and any internal rubber parts as shown….
STEP 10. Place the new thermal fuse into place this end first…
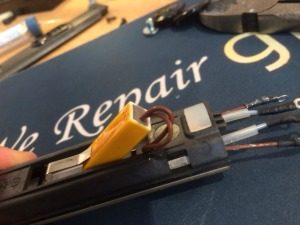
STEP 11. Fit into original position again the heater inside…
STEP 12. Reconnect to circuit board and reassemble the ghds.
If you have a model with a beeping feature…. Be sure that BOTH heaters are in full working order and not intermittent….or this new part will fail more or less straight away for safety….. PLEASE also ensure that the thermistor on the opposite heater is secure and reading correctly…again if it isnt this part will fail in no time at all
IDEALLY GHDs NEED TO RUN AT AROUND 185c. IF THEY ARE RUNNING OVER 200c THIS PART WILL FAIL AGAIN IN THE NEAR FUTURE
CONFUSED??? ASK US ABOUT OUR REPAIRS SERVICE AND LET THE EXPERTS DO THE WORK FOR YOU IF YOU ARE IN ANY DOUBT.
Reference to models stated in step 8 above…….
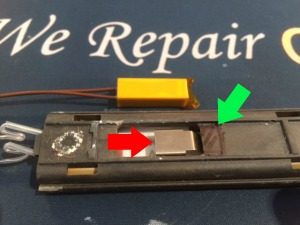
Cut or file away approx 10mm from the plate holder. (green arrow first)
Then slide up the thermal fuse holder (red arrow after you have done the above)
ONCE YOU HAVE DONE THIS GO BACK TO STEP 9